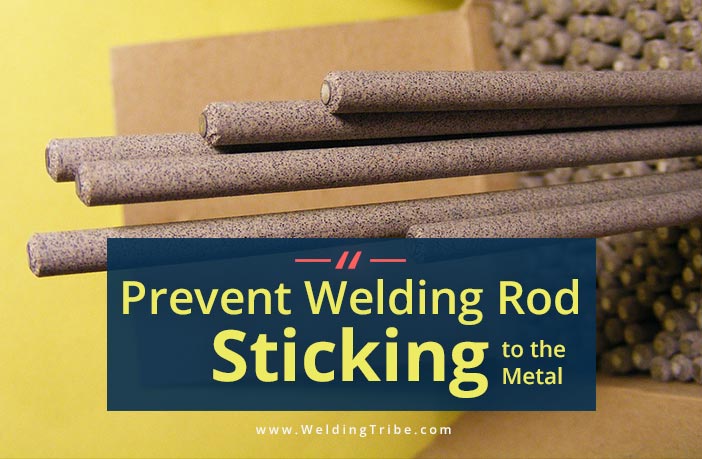
It’s just bound to happen! At some point in your welding career, this is a rookie mistake that could happen to anybody. But, have you ever thought the reason behind the welding rod sticking to metal?
Here’s briefly why…
Arc welding rod sticks to the parent metal due to low amperage values (Low current). Although this could be the MAIN reason, others include flux problems, using low OCV welders or the incorrect welding technique. Similarly, using the right electrode size for different welding tasks is also important. Practicing is the ‘key’ to prevent it from keep happening.
Many people think that Shielded Metal Arc Welding (SMAW) or “stick” welding gets its name because the electrode’s shape is like a stick. But it is called “stick welding” as many beginners stick the welding rod to the base metal as a learner. Even professionals do it at times. So if you think you’re alone, don’t worry, you’re not!
In this article, I will discuss in detail the correct welding techniques to prevent the electrode from sticking to the metal.
So, Let’s jump into it.
How to strike an arc: The easy way
Stick welding is considered as the most popular and easiest way to join two metal parts. If you are new to welding, nothing more annoying in this world than trying to brake your rod off the metal after attaching to it. Therefore learning how to strike an arc properly is crucial to save you some time and avoid material waste.
Now there are two methods to strike an arc.
- Scratch Start Technique (The easiest way for a beginner)
- Tapping Method (High chances of getting stuck to the metal).
For a quick start, I recommend practicing the Scratch Start Technique (Also known as dragging method) that is similar to striking a match. Below are the steps to practice it for your self.
To strike the arc for the first time,
- Decide which direction you need to travel and choose the starting point.
- Hold the rod (about 1 cm) above like an inch away from the starting point, tilted in the direction the welding will take place.
- Gently scrape the end of the rod against the base metal. Do not Poke!
- Once you see an arc quickly go back to the starting location and wait for the puddle to begin welding along the joint.
This takes a while to master. The key thing to remember is trying to balance the travel speed, angle, and arc length after striking the arc. Similarly, if you pull off the rod way too far, you are gonna lose the arc.
If you failed to strike an arc after multiple attempts it will cause to build up material on the tip of the electrode. The wise thing to do is just replace it with a new electrode and continue practicing. You can reuse the previous rod after rubbing the tip on a rough surface after cooling off.
Why does a welding rod stick to the base metal?
It’s always frustrating when you try to pull off that perfect weld but it just got ruined with splatter all around due to rod sticking to the metal. Well, here are 6 reasons why exactly this keeps happening.
1. Low current settings
As I mentioned before, welding rod sticks to metal mostly due to the low value of applied current. It means that the amperage is enough to melt the tip of the electrode but not sufficient enough to strike an arc.
2. Low Open Circuit Voltage
It becomes quite difficult to strike the arc if the OCV (Open Circuit Voltage) of your machine is too low. At low OCV, the arc keeps disappearing and you are most likely to stick the electrode while attempting to strike the arc again. A lower value of OCV may occur due to a high resistance connection between the ground and your workpiece.
3. Poor flux quality
Poor flux coating can also result in sticking problems. Keep in mind that the melting point of flux is always lower than the base metal. It means that before the base metal even starts melting, the flux is already in a liquid state. If your flux coating is poor, it may fall off the rod and form a molten lump which causes the welding rod to stick to the base metal.
4. Shorter arc length
Arc length is nothing but the distance between the tip of the electrode and the surface of base metal. In other words, it is just the length of the electric arc. If you bring the electrode too close to the base metal, it will be glued to the base metal. Similarly, if you push the electrode too far away, your arc will extinguish. Thus, it is extremely important to maintain a certain optimal arc length.
5. Dirty metal surface
If the surface of the base metal is too rusty, it becomes difficult to strike the arc. Even if you manage to sustain an arc, the welding electrode will keep sticking to the base metal at intervals. We can explain this by Ohm’s Law according to which
Voltage (V) = Current (A) X Resistance (Ω)
In other words, since the voltage is a constant, increase in resistance will cause a proportional decrease in current. Rusty surface increases the resistance of our circuit and hence, decreases the amount of current flowing. And as I told you before, lower amperage value is the number one cause of electrode sticking problems.
6. Incorrect electrode selection
Welding rods are of various types each with its own applications and benefits. Some rods work only for DC while other can function on both AC and DC.
A thick rod selection for welding thin sheets can also cause electrode sticking issues. Let’s say you are using a 5/64 inch E6013 rod at the right amperage value but still your filler rod keeps sticking to the base metal. One remedy to this can be to switch to thinner 1/16 inch E6013 rod.
As a novice, you face welding rod sticking issues many times and it must be very frustrating for you.
What to do when the welding Rod gets stuck to the metal?
No need to panic if your welding rod gets stuck to the metal. It happens to everyone. Just give it a nice jerk to set it free. It does not work if the electrode gets tightly glued to the metal. In that case, you have to immediately shut down the welder and break the rod off the metal. Many times when you yank the rod, the flux at the tip of the rod falls off it.
Now if you use this rod with a bare metal tip for the second time, most likely you will end up sticking it again. To prevent this, cut the rod to the point where the flux has fallen off by using a pair of pliers and you are good to go again.
Now it’s time to learn some useful stick welding tips that will help you prevent welding rod sticking problems.
Just stay boarded.
Tips to avoid welding rod sticking to the metal
We’ve discussed the reasons why this keeps happening. Now let’s talk about how to prevent it from happening.
1. Choose the correct current settings
Make sure you are using the right amperage value. Different types of electrode rods are designed to work at different amperage values. For example, 6010, 6011,6012 and 6013 can work at low current value. On the other hand, 7018 and 7024 type rods need high amperage value to start an arc.
Following stick welding amperage chart shows in detail the optimum DC current range for electrodes of different types and thickness.

As you can see the amperage value also depends on the rod thickness. If the electrode is thick, it needs a higher current to melt it. Therefore the ideal amperage settings should be determined by the type of electrode and the nature of the weld.
Sometimes, when the resistance of your circuit is a bit high, you can increase the current slightly above the range to make sure that the rod does not stick to metal. Also, remember when the tip of the electrode glows, it means the current applied is too high. So try to refer to the manufacture’s ampere range for the rod you’re using.
I would like to share a great tool I saw on millers website the other day. It’s called Stick welding calculator. When you provide the material and the rod type it will automatically give you the right parameters to use.
2. Keep the electrode and surface clean while using the correct rod size
Before commencing, make sure that your electrodes are not degraded or rusty. Try to rub the flux off the rod by your fingers. If the flux easily falls of the rod, the quality is poor and the electrode will be more sticky. Avoid using these poor quality rods.
Since larger rods give the highest deposit rate if the weld needs to have a good consistency, use a larger rod. Likewise, you have to decide which size of electrode you need to use by the nature of the weld.
Also make sure to remove any rust, moisture, oil or any kind of impurities from the surface of the metal before welding. Although stick welding is more forgiving in these kind of situations, this will save you from getting into unexpected troubles.
3. Try to keep a good ground connection
If the base metal has a poor connection to the ground, it can cause an increase in the total resistance of your circuit. A high resistance will result in low Open Circuit Voltage which will make it difficult to strike an arc. Make Sure you have a sound ground connection. Look for any cracks in the ground wire. If the terminal connections have gone too rusty, cut off the wire at both ends and make fresh joints.
An important thing to remember is that, you also have to make sure all the stick welding leads are connected properly depending on the application you’re using it for. You can learn more about this in this article I wrote.
4. Follow the correct arc striking technique
Electrode sticking problems are more frequent while striking an arc. It takes weeks or months of practice to learn the correct arc striking skill. The two most commonly used arc striking methods are called the dragging method (also called the striking method) and the tapping method that we discussed earlier.
5. Use an appropriate arc Length
Once you have managed to sustain a stable arc try to maintain an appropriate distance between the rod tip and base metal. Try to keep the distance short but make sure not to touch the metal. Also, do not increase the arc length too much as it will cause the metal to splatter all over the place.
A general rule of thumb is never to exceed the arc length higher than the diameter of the metal core of the electrode.
6. Keep the angle and the travel speed at the appropriate level
I’m sure you know the basic welding positions by now. You will have to make sure you’re in a comfortable position to keep the consistency of the weld until the last moment.
For example: If you keep the stinger (Welding rod holder) in your right arm, plant your left elbow on the workbench and take advantage of that to stabilize your electrode. This way, you can keep the travel speed and the angle at the same level without hassle.
If you increase the travel speed that will reduce the penetration and if you slow the speed that will provide shallow deep penetrations. Therefore try to keep a balance between them for a quality weld finish.
7. Choose a suitable electrode
Thick electrodes are difficult to get a hold on and are more likely to stick. If you are a beginner, my suggestion would be to start with a thin 6013 welding rod as they are quite easy to handle. As you earn more experience, you can advance towards E7018 and E7024.
8. Store welding rods at a dry place
If you are just using E6013 or E6011 you don’t need to worry much about their storage. Any electrode with a name having 10,11,12 or 13 as the last two digits (such as E6013, E6012, etc.) can be stored in a dry case at room temperature. But in the case of E7018 or E7024 rods, you should show some extra care to maintain their quality. Store them in dry ovens where you can maintain a temperature of 200-400 degrees Fahrenheit.
To sum up
As I mentioned above, the most common cause of welding rod sticking problems is the low amperage value. Following the aforementioned simple techniques will help you a lot with your welding experience.
But keep in mind that practice is what makes a stick weld perfect. So guys PRACTICE! PRACTICE! and PRACTICE!
Thank you so very much for this much needed information.
Thank you for the info! As I’m a beginner I find this page very useful. Cheers!
superb explanation, thank you
I have been fighting this rod sticking for about 2 hours now. Hahaha. I just bought a Daiden 300 amp inverter welder and I have 2.5 mm / 3/32 rods and am trying at different currents. 80,90,and so on. That rod sticks every time. I try scratching but no luck. HEPL!!!!!
If you’re still having problems and just can’t seem to get it not to stick, try to quickly break the rod free each time it sticks then quickly strike it again and repeat, and as the rod gets hotter it becomes a little easier to light an arc…
Try using Forney welding rods like E6013 and the correct settings.
Good for my teaching welding lesson…keep up a good information
highly informative post
melting rod has been big problem regarding welding. you have rightly pointed out about the protection for it.
Thanks for the info very informative as I’m just starting to use an old Cytringan minor welder. Just for fun at 66 yrs old .
This is the first problem of every welder that only starting on a stick welding. I have a lot of problems with a sticking rod but it’s just normal for beginner and when you start to know the temp of your machine you are good in the next couple of projects.
Good to know this is normal for beginners. I’m going to keep my first welding practice plate, for future reference.
I appreciate all the welders who are making videos to show newbies like me, to learn new habits. Not have to break bad habits we learn as we struggle to learn to weld.
Great article. I’m going to be spending a lot more time reading your site after this great article.
Gota ??? For those who welder i just recently started stick welding i went and bout and 80 amp Chicago mini arc stick welder and had poor starts luck bit have got better but kno i dont kno how to clean my leads wt do i use a file or spray or just replace it thanks
Thanks Ser this is a big help for me…
Very helpful information for beginners like me.
This is great! I’m a high school student and I’m taking a beginning welding class. Thanks! This helps a lot!
Get a scratch scrap metal strip about 1/4″ thick and 12 inches long and 2.5 to 3 inches wide. As it is used it gets rougher with metal bits and pockets which inhibits sticking. Run the rod across it like striking a match a couple times at a quick snap action. Heated rod will arc on the to-be-welded metal much easier and consistently. Do your tacks and that heats up the work and the rod even more. Makes for much more satisfaction welding.